A technical SEO audit checks whether search engines can crawl, render and index your most valuable pages, and whether users get a fast, stable experience. Crawl the site, compare what should be indexed with what Google actually indexes, fix blockers such as broken redirects, duplicate URLs and rendering problems, then prioritise every issue by revenue impact and effort so developers work on what moves the needle first.

On this page
- What a technical SEO audit covers
- Step 1: Crawl the site like a search engine
- Step 2: Audit indexation
- Step 3: Review site architecture and internal linking
- Step 4: Test JavaScript rendering
- Step 5: Check performance and Core Web Vitals
- Step 6: Status codes, redirects and broken links
- Step 7: Validate structured data
- Step 8: Mobile, HTTPS and international setup
- Step 9: Analyse server logs (for larger sites)
- Prioritising what you find
- What to hand a developer
- How often to re-audit
- Frequently asked questions
A technical SEO audit answers a simple question: is anything stopping search engines from finding, understanding and ranking the pages that make you money? Content and links get the attention, but a single misplaced noindex tag, a botched migration or JavaScript that hides product links can quietly erase months of work. This playbook is the process our team uses, organised so you can run it yourself or brief an agency. Use it as an SEO audit checklist, including JavaScript SEO, crawlability, indexation and Core Web Vitals.
What a technical SEO audit covers
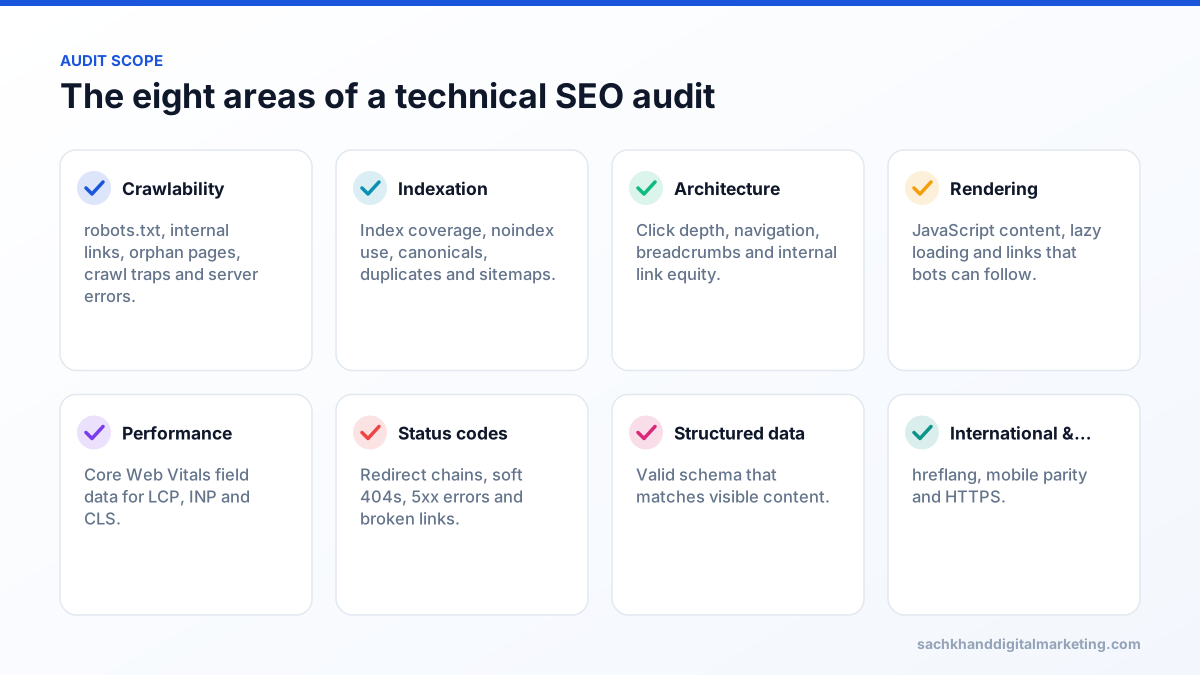
Before you start, gather access to Google Search Console, your analytics platform, the CMS and ideally server logs. You will also need a crawler such as Screaming Frog, Sitebulb or a cloud crawler, and PageSpeed Insights for performance data.
Step 1: Crawl the site like a search engine
Run a full crawl starting from the homepage, with JavaScript rendering enabled for sites that rely on it. Also crawl the XML sitemap URLs separately. Comparing the two quickly reveals problems:
- Orphan pages: URLs in the sitemap or analytics that receive no internal links.
- Non-indexable URLs in the sitemap: redirects, 404s, noindexed or canonicalised pages that should not be listed.
- Crawl traps: calendars, session IDs, internal search results and filter combinations generating near-infinite URLs.
- Server errors: 5xx responses, timeouts and slow response times on important templates.
Google says crawl budget is mainly a concern for very large sites (roughly a million or more pages) or sites with tens of thousands of pages that change daily. For smaller sites, the issue is usually not budget but wasted crawling of low-value URLs and weak internal linking to important ones.
Step 2: Audit indexation
Open the Pages report in Search Console and work through each “not indexed” reason, starting with URLs that should be indexed.
| Search Console status | What it usually means | Typical fix |
|---|---|---|
| Excluded by noindex tag | A noindex directive is present | Remove it from pages that should rank |
| Crawled, currently not indexed | Google judged the page low value or duplicative | Improve content, consolidate thin pages, add internal links |
| Discovered, currently not indexed | Known but not yet crawled | Improve internal links, reduce low-value URLs, check server speed |
| Duplicate without user-selected canonical | Google found duplicates and picked one | Add canonicals, consolidate or differentiate content |
| Alternate page with proper canonical tag | Working as intended | No action unless the wrong page is canonical |
| Soft 404 | Page looks empty or like an error | Add real content or return a 404/410 |
| Blocked by robots.txt | Crawling disallowed | Allow crawling if the page should be indexed |
Index bloat
The opposite problem is too many low-value pages indexed: tag archives, thin location pages, parameter URLs, internal search results and duplicate product variations. They dilute quality signals and waste crawling. Use a site: search and the indexed count in Search Console to compare against the number of pages you actually want in Google, then noindex, canonicalise, consolidate or remove the excess.
Canonicals and duplicates
- Every indexable page should have a self-referencing canonical.
- Canonical tags are hints, not directives. If internal links, sitemaps and redirects contradict them, Google may choose a different URL.
- Check http/https, www/non-www, trailing slash and uppercase variants all resolve to one version with a single 301.
Step 3: Review site architecture and internal linking
Important pages should be reachable within about three clicks of the homepage and linked from relevant content, not only from navigation. In your crawl data, sort by click depth and by number of internal links received (inlinks). Money pages with few inlinks or deep click depth are prime candidates for quick gains. See website structure for architecture patterns.
- Breadcrumbs with BreadcrumbList structured data on hierarchical sites.
- Descriptive anchor text rather than “click here”.
- Related links between sibling pages and from blog content to service or category pages.
- No important links hidden behind JavaScript events that are not real
<a href>elements.
Step 4: Test JavaScript rendering
Google renders JavaScript, but rendering can be delayed and errors are common. For each key template, compare the raw HTML with the rendered HTML using the URL Inspection tool’s live test or your crawler’s rendering mode.
- Is the main content, including headings and product information, present in the rendered HTML?
- Are navigation and pagination links real anchor tags with href attributes?
- Do titles, meta descriptions, canonicals and structured data appear correctly after rendering, and do they match the raw HTML?
- Are resources needed for rendering blocked by robots.txt?
- Does lazy-loaded content load without user interaction such as scrolling or clicking?
For content-heavy and ecommerce sites, server-side rendering or static generation remains the most reliable option.
Step 5: Check performance and Core Web Vitals
Use Search Console’s Core Web Vitals report to find failing URL groups, then diagnose templates in PageSpeed Insights. Always prioritise field data from real users over lab scores. The thresholds are LCP of 2.5 seconds or less, INP of 200 milliseconds or less and CLS of 0.1 or less at the 75th percentile. Our Core Web Vitals guide covers fixes in detail.
Step 6: Status codes, redirects and broken links
- Redirect chains and loops: update internal links to point to the final URL and collapse chains to a single 301.
- Temporary redirects (302/307) used for permanent moves: switch to 301 or 308.
- Broken internal links: fix or remove links to 404 pages.
- Removed pages with backlinks: redirect to the closest relevant page rather than the homepage.
- 5xx errors: investigate hosting capacity and application errors; repeated server errors reduce crawling.
Get a prioritised action plan from our specialists, free.
Step 7: Validate structured data
Run key templates through Google’s Rich Results Test and the Schema Markup Validator. Check that markup is valid, uses types Google supports, and matches what users can see on the page. Common useful types include Organization, LocalBusiness, Product with Offer and Review, Article, BreadcrumbList and VideoObject. Remember that FAQ rich results are now shown mainly for authoritative government and health sites, so do not expect FAQ markup to expand ordinary listings.
Step 8: Mobile, HTTPS and international setup
- Mobile pages contain the same primary content, headings, links and structured data as desktop.
- All pages load over HTTPS with no mixed-content warnings.
- For multi-language or multi-country sites, hreflang tags are reciprocal, use correct language-region codes and point to canonical, indexable URLs.
Step 9: Analyse server logs (for larger sites)
Log files show what Googlebot actually requests. Look for important sections crawled rarely, large volumes of crawling on parameter URLs or redirects, and status codes returned to bots. Verify Googlebot by reverse DNS, since many bots spoof its user agent.
Prioritising what you find
An audit that hands developers a 300-row spreadsheet rarely gets implemented. Group findings into tiers and map them on an impact-effort matrix.
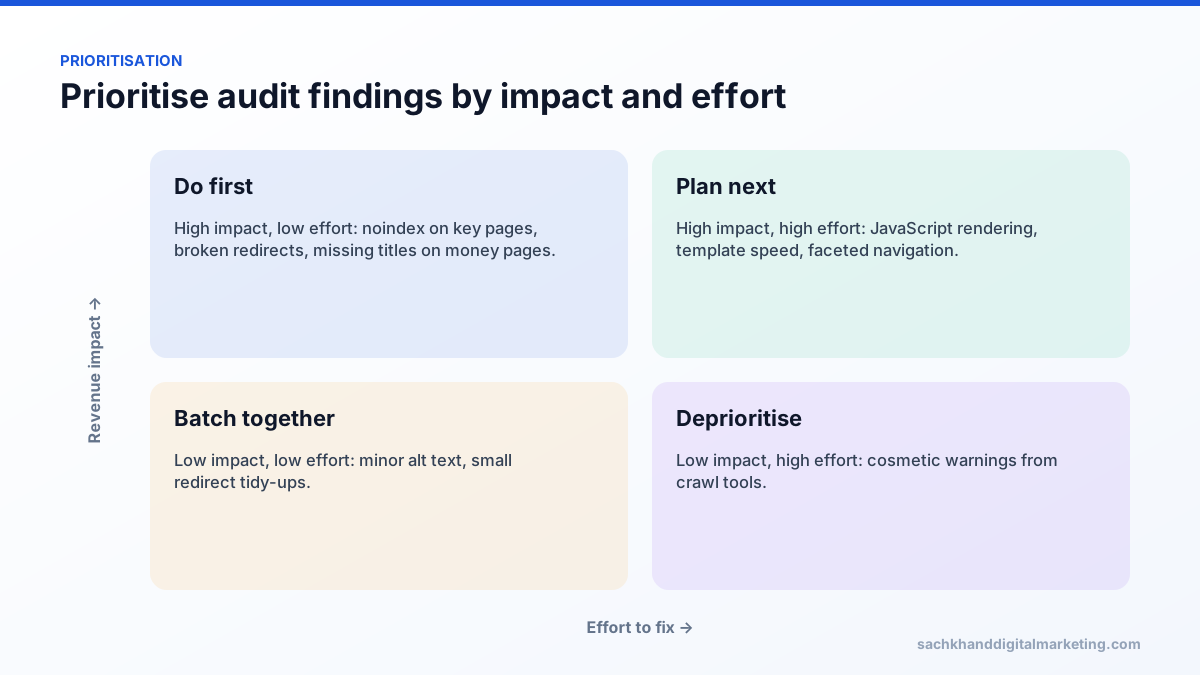
Tier one: revenue at risk
Anything preventing important pages from being indexed or ranking: noindex or robots blocks on money pages, broken canonicals, migration redirect errors, severe server errors and rendering failures.
Tier two: blocking other work
Issues that limit the impact of content and link investment: weak internal linking, index bloat, duplicate templates and failing Core Web Vitals on key templates.
Tier three: incremental
Improvements that help at the margin: image optimisation, minor redirect chains, meta description gaps and schema enhancements.
What to hand a developer
For each issue, provide a ticket developers can act on without a meeting:
- A plain-language description and why it matters commercially.
- Affected templates or URL patterns, with three to five examples.
- The expected behaviour, for example “returns 301 to /services/local-seo/”.
- How to test that the fix worked.
- Priority tier and estimated impact.
How often to re-audit
Run a full audit at least once a year and before and after any redesign, platform change or migration. In between, monitor Search Console weekly for indexing and Core Web Vitals changes, and schedule a monthly crawl to catch new broken links, redirect chains and accidental noindex tags before they cost traffic.
Frequently asked questions
What is a technical SEO audit?
A technical SEO audit is a structured review of how well search engines can crawl, render and index a website, and how fast and stable it is for users. It covers crawlability, indexation, site architecture, JavaScript, Core Web Vitals, status codes, structured data, mobile and international setup.
How often should I run a technical SEO audit?
Run a full audit at least once a year and before and after any redesign or migration, with lighter monthly crawls and weekly Search Console checks in between.
What tools do I need for a technical SEO audit?
Google Search Console, a crawler such as Screaming Frog or Sitebulb, PageSpeed Insights, Google’s Rich Results Test and, for larger sites, server log analysis.
How long does a technical SEO audit take?
A small business website can be audited in a few days. Large ecommerce or enterprise sites often take two to four weeks including log analysis and prioritisation.
What is the most common technical SEO problem?
In our experience the most costly are accidental noindex or robots.txt blocks, migration redirect mistakes, index bloat from low-value URLs and JavaScript that hides content or links from search engines.
Want us to find and fix these issues on your site?
Talk to our team about your goals. We will show you where the biggest wins are, starting with a free, no-obligation audit.